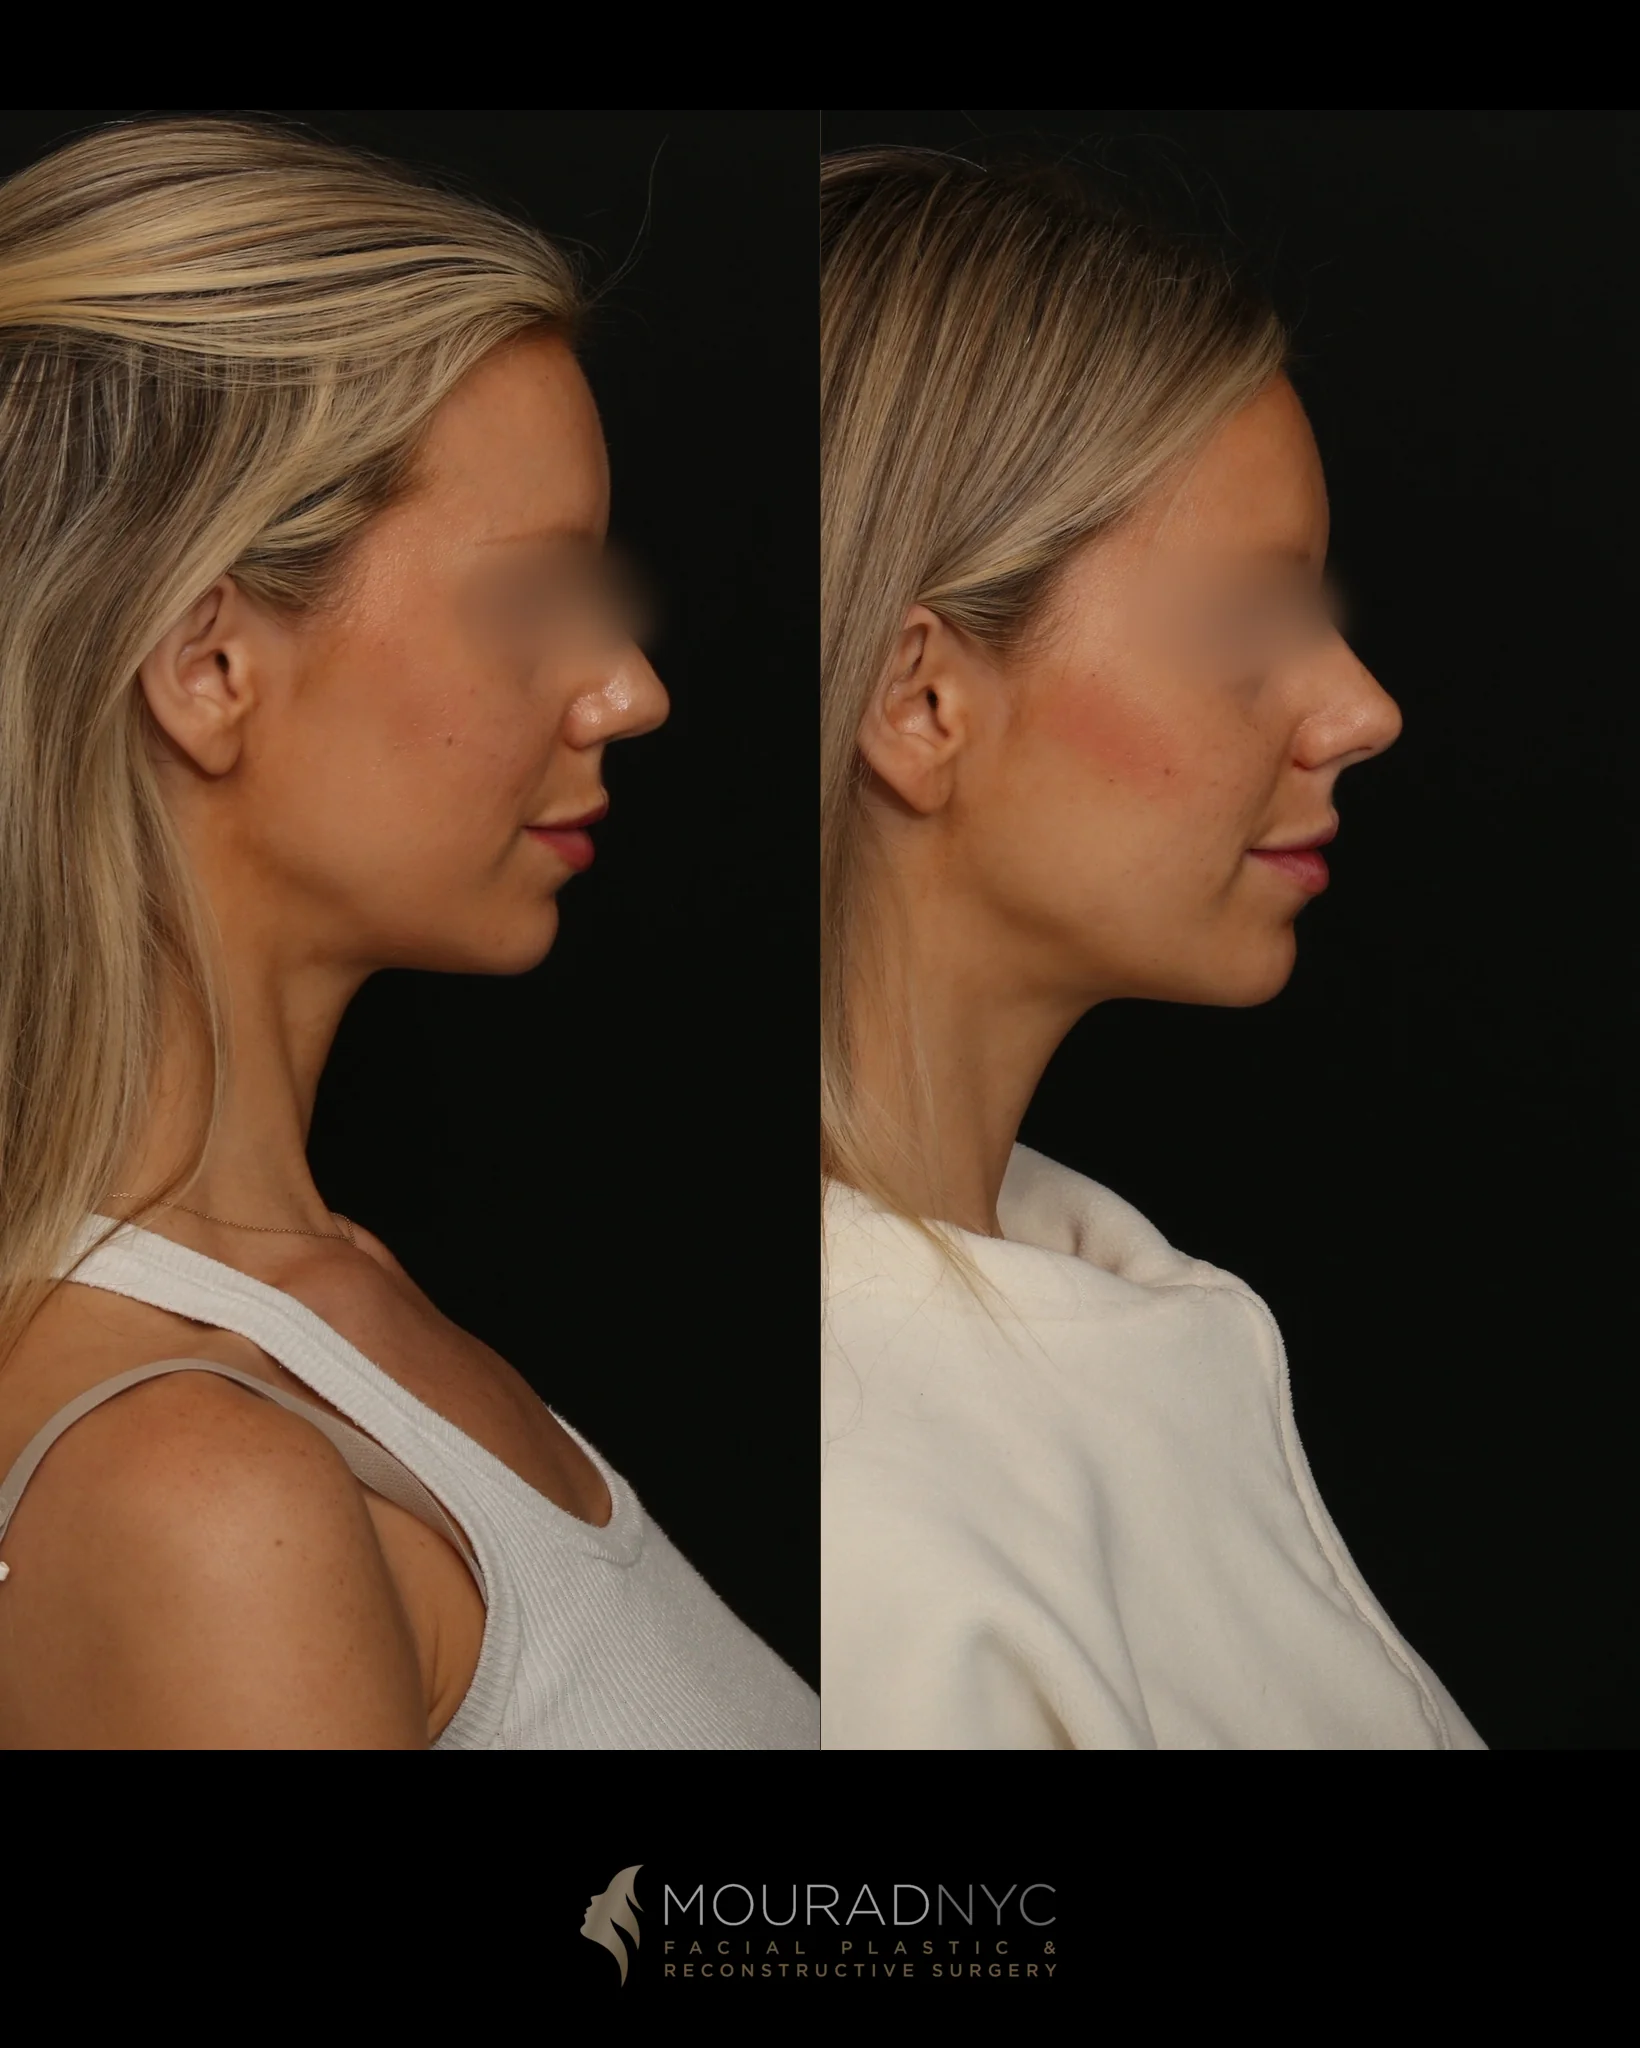
Case 86: Nasalift™ Before & After
Before-and-after right lateral profile photographs of a Nasalift™ patient at rest and while smiling. The left half of each comparison is before and the right half is after. Eyes have been blurred for privacy; written photographic consent is on file. Individual results vary; these photographs do not predict another patient's outcome.
For candidacy, technique, recovery, and cost, see the full Nasalift™ page.
Learn what nasalift™ involves, who is a candidate, and what recovery looks like.
This patient provided written photographic consent prior to publication. Consent may be withdrawn at any time.
Results vary by patient. A consultation maps your specific anatomy and goals.
Schedule a consultation →The photographs on this page are standardized clinical images captured at consistent angles and lighting so the same anatomy can be compared over the course of healing. They document one patient's anatomy and recovery and are shown for educational purposes only. Surgical planning is individualized to each patient's anatomy, breathing, and goals during an in-person evaluation with Dr. Mourad, so the images here are not a representation of what any other patient should expect.
Individual results shown — not predictive of outcomes in any future patient. Consult with Dr. Mourad for a personalized evaluation.